
10 tips for photography skills for beginners
Photography is an important skill to develop for a number of reasons. It can be used to capture memories, document events, and tell stories. Better photography skills can also be used as a form of art.
Photographs are inherently a visual medium, so it is important to ensure that your images have the greatest impact possible. This can be done through careful planning and execution of your shots, and even more importantly, post-processing your photographs.
Section 1: Research
No matter what level of photographer you are, research is key to success. By taking the time to understand your subject, you will be able to produce better photographs. Here are 10 tips for photography skills:
1. Start with the basics. If you are new to photography, start by doing some basic research on the different types of cameras and equipment available. Once you have a good understanding of the basics, you can move on to more specific topics.
2. Use online resources. There are a wealth of online resources available to help you improve your photography skills. Take advantage of these by reading articles and watching tutorials.
3. Join a community. There are many online and offline communities dedicated to photography. Joining one of these can be a great way to meet other photographers and learn from their experiences.
4. Attend workshops and seminars. Getting the chance to learn from a professional can be a great way to improve your skills. You can find workshops and seminars on photography at many community centers and educational institutions.
Section 2: Practice

If you want to improve your photography skills, practice is essential. Here are some tips to help you get the most out of your practice sessions:
1. Set aside time each week to practice. Dedicated practice time will help you make the most progress.
2. Shoot in a variety of settings and lighting conditions. This will help you learn to adapt to different situations and hone your skills more quickly.
3. Take lots of photos! The more you shoot, the more opportunities you’ll have to experiment and learn new things.
4. Keep a journal or log of your practice sessions. This will help you track your progress and identify areas that need improvement.
5. Be patient with yourself! Learning new photography skills can take time, but it’s worth it in the end.
Section 3: find your niche

As a photographer, it’s important to find your niche and specialize in a certain area. This will help you stand out from the rest and attract clients who are looking for someone with your specific skill set. Here are a few tips for photography skills to help you find your niche:
1. Think about what kind of photography you’re passionate about. Do you love taking nature shots? Are you good at capturing candid moments? Narrowing down your focus will make it easier to find your niche.
2. Take a look at the work of other photographers and see what styles or genres they specialize in. This can give you some ideas of what might be a good fit for you.
3. Don’t be afraid to try something you’re not familiar with. You can always refine your skills and move forward from there.
4. Consider what kind of photography you want to do in the future. Do you want to build your portfolio, or earn money quickly?
Section 4: Use the rule of thirds

When it comes to photography skills for beginners, the rule of thirds is one of the most essential guidelines to follow. This compositional technique helps to create balance and visual interest in your photos. To use the rule of thirds, simply imagine your frame divided into nine equal sections.
Then, position your subject along one of the lines or at one of the intersections. This will help to create a more dynamic and pleasing composition.
Keep the following in mind when using the rule of thirds:
- The lines don’t have to be perfectly straight–they can be curved or diagonal.
- Your subject doesn’t have to be centered in the frame. In fact, off-center compositions are often more interesting.
- You can use more than one subject to fill the frame–just make sure they’re positioned along the lines or intersections.
- Alternatively, you can create a more static and balanced composition by positioning your subject in the center of your frame.
Section 5: Experiment with shutter speed

If you’re looking to improve your photography skills, experimenting with shutter speed is a great place to start. By changing the shutter speed, you can change the effect of your photos. A faster shutter speed will freeze motion, while a slower shutter speed will create a blur effect.
Here are a few tips for photography skills experimenting with shutter speed:
1. Decide what effect you’re going for. Do you want to freeze motion or create a blur?
2. Set your camera to the appropriate mode. If you’re not sure, consult your camera’s manual.
3. Adjust the shutter speed until you get the desired effect.
4. Take some test shots and see how they turn out.
5. Make sure to experiment with different shutter speeds to see what works best for different situations.
Section 6: Aperture priority mode
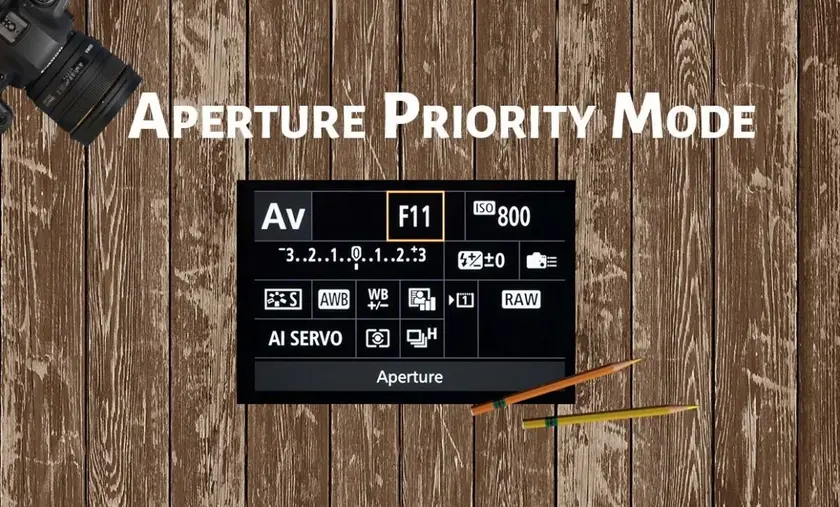
The photography skills for beginners, aperture priority mode is one of the most important settings on your camera. By understanding how to use it, you can take better photos.
In aperture priority mode, you set the aperture while the camera sets the shutter speed. The aperture is the size of the opening in the lens through which light passes. The shutter speed is how long the shutter stays open, exposing film or a digital sensor to light.
By controlling the aperture, you can control how much light enters the camera. A wider aperture (a smaller f-stop number) lets in more light than a narrower aperture (a higher f-stop number).
Wider apertures are great for low-light situations and for creating shallow depth of field, while narrower apertures are better for well-lit scenes and for getting more of your image in focus.
Section 7: Shoot in RAW files

RAW files are the best way to shoot if you want complete control over your final image. You’ll be able to adjust things like white balance, exposure, and noise reduction in post-processing, giving you much more flexibility than if you shot in a JPEG.
There are some downsides to shooting RAW – the files are larger and take up more space on your memory card, and they can be more difficult to work with. But if you’re serious about getting the best possible results from your photos, RAW is the way to go.
A RAW file is the unprocessed data from your camera’s sensor, saved in a proprietary file format.
Section 8: Use Prime Lens

If you’re serious about better photography skills, then you need to start using a prime lens. A prime lens is a fixed focal length lens that doesn’t zoom. This means that you have to physically move yourself to get the framing that you want. While this may sound like more work, it actually forces you to be more creative and results in better photos. Here are 5 reasons for getting the most out of your prime lens:
1. Get closer to your subject. With a prime lens, you can’t just zoom in on your subject. This means that you have to get physically closer to them. This can be intimidating at first, but it’s actually a great way to connect with your subjects and get them to open up.
2. Prime lenses always come with a wide aperture. Use a wide aperture. A wide aperture (low f-stop number) gives you a shallow depth of field. This makes your subject stand out from the background, giving you a unique and creative photo.
3. Prime lenses are small and lightweight. Take them everywhere you go. If you’re always carrying around a bulky DSLR camera and lens, you’ll never have the opportunity to take photos when it counts. Prime lenses are so small that they can easily fit in your pocket.
4. Prime lenses produce high-quality photos. You don’t need a lot of money to get high-quality photos. Use prime lenses and you’ll be surprised at what you can do with them.
5. Prime lenses don’t zoom and that’s a good thing.
Section 9: Manual Mode
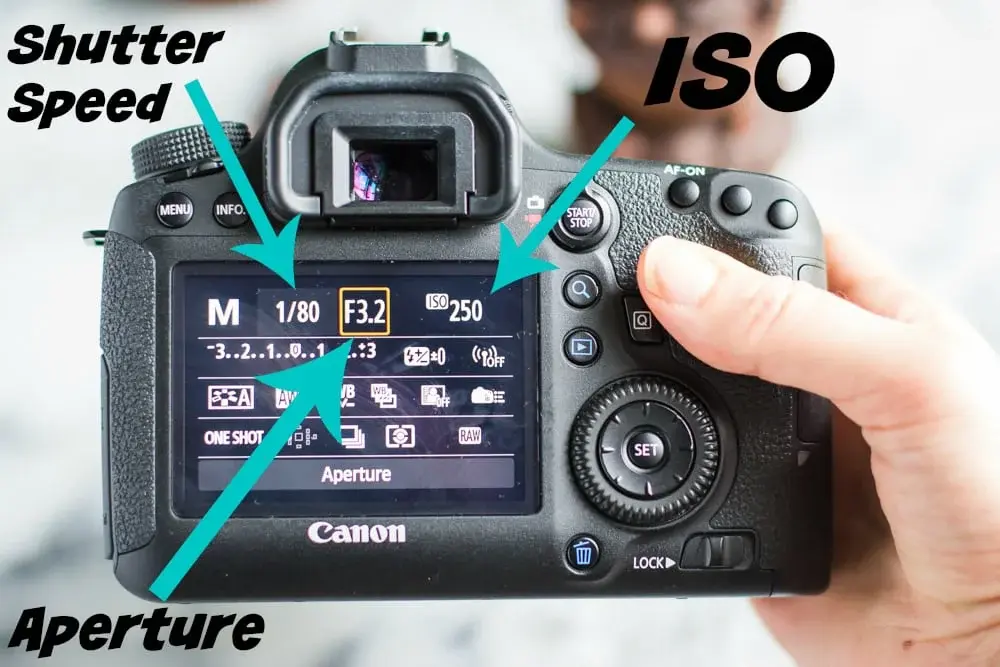
For better photography skills, there are a number of ways to set your camera to get the best results. One way is to use manual mode. This allows you greater control over your settings and can help you get the most out of your photos. Here are some tips for getting the most out of manual mode:
1. Get to know your camera’s capabilities. Read the manual and experiment with all the different settings. This will help you understand what each setting does and how it affects your photos.
2. Take advantage of all the features manual mode offers. Explore different shutter speeds, apertures, and ISO settings to see how they affect your photos.
3. Pay attention to lighting conditions. Manual mode gives you the ability to adjust for different lighting conditions, so make sure you take advantage of that.
4. Experiment with different compositions. Just like with aperture, shutter speed, and ISO settings, each of your compositions will be different. If you’re not sure how to compose a particular shot, experiment with different angles until you find something that works for you.
Section 10: Use Tripod
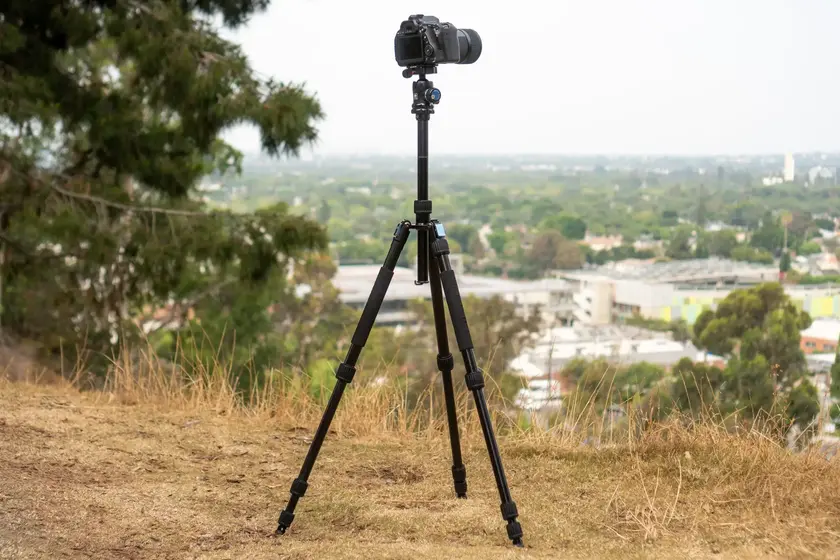
A tripod is an important tool for any photographer, whether you’re just starting out or you’ve been taking pictures for years. Here are 6 tips for getting the most out of your tripod:
1. Use a tripod whenever possible. This will help you avoid blurry pictures and ensure that your camera is steady.
2. Invest in a good-quality tripod. Cheap tripods can be unstable and cause your pictures to be blurry.
3. Make sure the tripod is level before you start taking pictures. This will help you avoid crooked photos.
4. Use the timer on your camera to avoid shaking when you press the shutter button.
5. If possible, use a remote shutter release to avoid shaking even further.
6. Experiment with different compositions when using a tripod.
Conclusion: Better Photography Skills

No matter your level of experience, there are always ways to improve your photography skills. By following these 10 tips, you can develop your eye for composition, learn to use light to your advantage, and take better photos overall. With a little practice, you’ll be taking amazing shots in no time!
When it comes to photography, practice makes perfect. By following these 10 tips, you can vastly improve your photography skills and take better pictures than ever before.
Get to know your camera. Read the manual and experiment with all the features and settings. Find out what each does and how it affects your photos.
Take lots of pictures. The more you practice, the better you’ll get at it. And don’t be afraid to experiment – try different angles, lighting, compositions, etc.
Study other photographers’ work. Look at magazines, books, and online galleries to see what others are doing and how they’re achieving certain effects. Then try to replicate those techniques in your own work.
Hope all these tips help you move forward to a better photography skills journey. If you found this article helpful, please help me share it with others too, I’d appreciate it. If you have any opinions, please leave me a message. Thank you so much for reading.


